One of the finest things you can do to improve the game’s aesthetics is to install the reshade for The Sims 4.
Now one of the longest-running live-action video games, The Sims 4 launched in 2014.
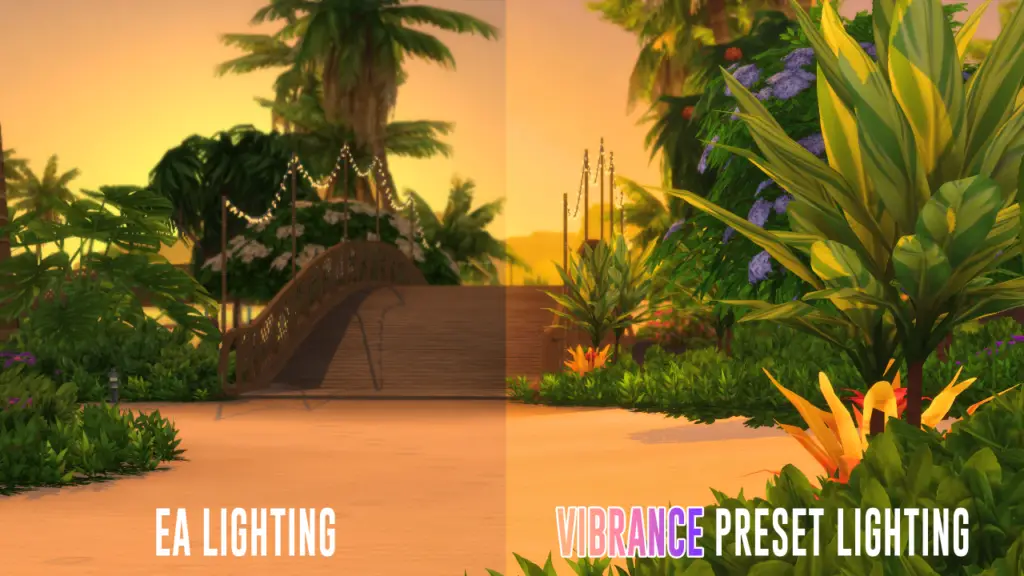
Its graphics are subpar in comparison to those of newer games, therefore improving them is always a good idea.
Now, the question is, where can I find the Sims 4 reshade and how can I get it installed?
To begin, the reshade is technically a modification because it alters the visual style of the game.
However, it does not follow the standard procedure for setting up software.
Because of this, you can’t just extract it and then move the resulting files to the game’s Mods folder.
To make it function, you’ll have to take some additional measures.
So, without further ado, let’s discuss about getting the reshade for Sims 4 and setting it up.
How To Download And Install Reshade In Sims 4?
Of course, getting the reshade installed is your first order of business.
If you click on this link, you can find out how.
Under the “How To Download The Sims 4 Reshade?” header, you’ll see the download button.
Following the reshade mod download, these are the steps to installing it:
- Launch the Reshade executable file.
- You may get the mod from a variety of locations, some of which depend on whatever download server your browser uses.
- Most individuals just use their ‘This PC’s Downloads’ folder for this purpose.
- You may pick the game you want to play now.
- Choosing your game is necessary since the reshade may be used to improve not only The Sims 4, but many other games as well.
- This may be done once you locate your Sims 4 installation folder.
- Again, for the vast majority of players, the path is C:Program Files (x86)Origin GamesThe Sims 4GameBin. Choose the.exe file format at this point.
- Choose Direct3D 9 Direct3D 9, Open GL, Vulcan, and more options will be presented once the game has been selected.
- For The Sims 4, however, you need simply choose Direct3D 9.
- Check the boxes next to the effects you wish to use in the game.
- If you want to dramatically improve the quality of your visuals, you should choose “All of the effects” in this list.
- The more programs you have open at once, the more strain you’ll place on your computer.
- However, if you want The Sims 4 to look its best, you should choose all of the available customization choices.
- Download everything by clicking Ok a few times.
- The software will now operate independently to get the components it needs to implement your selection.
- It shouldn’t take more than 5 minutes to do this task.
- It’s easy to customize the reshade effects with only a click.
- Multiple settings are available for download, and you may switch between them at any time.
- This is one of the nicest presets I’ve used, and you can get it right here.
- Get the preset you downloaded and unzip it.
- Use WinRar or some other archive manager for this.
- The extracted preset should be pasted into the same C:Program Files (x86)Origin Games folder.
- Bin: The Sims 4 Game. The Bin folder is where the preset should be placed.
- Choose a reshade profile that suits your needs. To choose your desired settings, just use the ellipsis (…).
- Put the game in motion.
In other words, you have successfully installed the Sims 4 reshade.
So, that’s how you set up reshade for The Sims 4!
Granted, the Sims 4 reshade is not exactly a piece of cake to set up.
In fact, it’s one of the trickiest requirements in the game. In any case, if better visuals are a must, then it’s money well spent.