Rooms 1 and 2 of the Hogwarts Legacy Depulso Puzzle are concealed somewhere on the grounds of the school.
The puzzles that you will accomplish during the Hall of Herodiana side quest are not to be mistaken with this one, yet they function in the same manner since they are similar.
To be successful in completing these tasks, you will need to become proficient in the manipulation of blocks in order to access treasure chests that contain valuable equipment.
It is necessary to complete the Hogwarts Legacy Hall of Herodiana side quest before you can access these buttons.
This is because these buttons will only appear after you have completed the side quest. Completing the quest will provide you with an understanding of how to move the blocks around the chamber, how utilizing reset blocks can assist in solving the puzzles, and how combining blocks works.
Initially, it will be your responsibility to locate both of the rooms that are contained within the open-world game. Once you have done so, you will need to make your way through these chambers with the assistance of two essential Hogwarts Legacy spells, namely Accio and Depulso.
The following is a complete list of the answers to the two Hogwarts Legacy Depulso Puzzle Rooms that are totally optional.
Hogwarts Legacy Depulso Puzzle Room 1
Hogwarts Legacy: Down the steps from the Potions classroom is where you will find the door to the first Depulso puzzle room in the Depulso Puzzles headquarters. There is a button that, in order to activate it, needs you to press something called Depulso.
Location
In order to get access to Depulso Puzzle Room 1, you must first descend from the Floo Flame location known as the Potions classroom and then go to the closed door located at the end of the corridor.
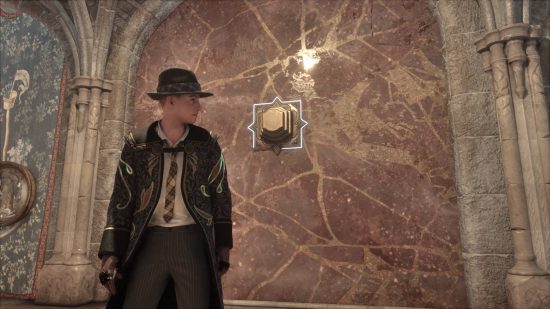
Near the beginning of the next area, you will come across a large button that is comparable to the one you used to discover the location of the Hall of Herodiana quest. Proceed inside once you have pushed it with Depulso.
A Legacy of Hogwarts In problem Room 1, the Depulso problem refers to the arrangement of the stairs that lead to the first chest.
Chest #1
In order to obtain the first chest, you will need to leap from the highest point of the platform down to the ground below.
Make use of Accio on the block that is located on the wall to the right so that it appears behind you.
When you have finished doing this, proceed to the left side of the two moveable blocks that are located in the middle and depulse them so that they travel to the wall that was occupied by the block that you moved before.
Proceeding up these two blocks will bring you to the first chest in the area.
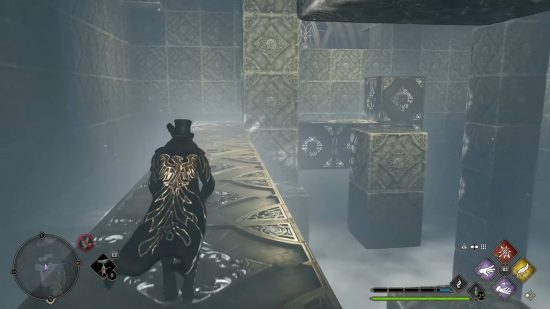
Hogwarts Legacy: A portion of the Depulso puzzles that are required to construct the stairway leading to the second chest in Puzzle Room 1.
The stairwell is now located at the top of the block, that is located on the other side of the chamber in Hogwarts Legacy.
Chest #2
The basic spell should be used on the reset button that is located across the room from the initial chest. Jump back down and utilize it. The next step is to cast Accio on the same block that is located on the right side of the room in Hogwarts Legacy.
This will cause the block to travel across the room, beneath the reset button, and then again to move it to the rear of the room.
The next step is to move to its right-hand side, depulso it to the back-left corner of the room from whence you entered it, and then cast Accio to bring it forward. After this, you should have a single block that is two spaces higher than a set of two blocks.
The second chest in the Depulso puzzles may now be accessed through the stairs that have been constructed.
Once you have located the floating block that you are able to move in the middle of the room, cast either Accio or Depulso in order to move it under the reset button.
After that, using Accio, transport it to the rear of the room, and then using Depulso, move it to the bottom left corner of the room.
Take the two blocks that are located at the bottom of the improvised staircase that you are constructing with Accio, and then send the building that is in the shape of a L back to the position that was previously occupied by the block that was the highest.
Depulso should be used to move the block near the rear wall to the back-left corner, and Accio should be used to finish the staircase, which you may climb to obtain the second chest.
Finally, you should turn around and complete the staircase.
There are three bricks that have been placed at the far end of the first puzzle area from the Depulso puzzles in Hogwarts Legacy.
Chest #3
Casting Accio from the floating block in the middle of the room will bring it below the reset button. After that, cast Depulso to send it to the wall in front of you.
A cheeky block is hidden next to the wall on the left, so you should try to get past it and cast Accio to send it towards the front wall.
After that, use Accio to move it beneath the block that was in front of it.
In the following step, you will need to move the block that is located on the ground in the middle of the room and move it to the wall on the left.
Create a reverse L-shaped structure by casting Accio twice to link it to the other blocks. This will be done from there.
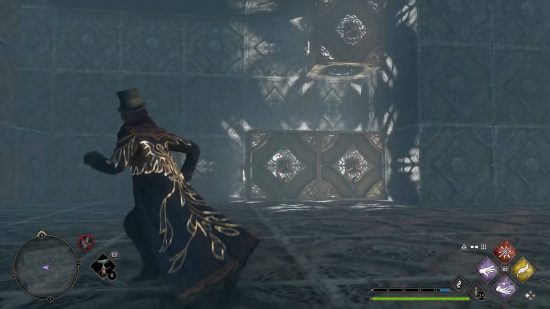
Following the construction of a bridge using a lengthy line of blocks, the wizard is ascending the blocks in order to traverse the gap and arrive at the stairs leading to the third chest in the Depulso puzzles environment.
Move to the block that is located at the rear of the room and place it next to the two other blocks that are there. Cast Accio to merge the three blocks together so that the single block is still against the rear wall in Hogwarts Legacy.
After that, cast Accio to send the single block to the back right wall. Once again, cast Accio to move the three blocks to the vicinity of the first chest, and then once more to move them to the center of the chamber using the same spell.
Depulso should then be used to move the three blocks to the front wall, and then it should be depulsoed so that it is against the ledge where the third chest is located.
Finally, Accio should be used to bring it back towards the edge of the room. Using Depulso once more will, at long last, produce a temporary bridge that you will be able to traverse.
When you want to get your prize, you have to climb up the reverse L form in Hogwarts Legacy.
Take a trip to the rear left wall of the area, where you will discover a freshly constructed set of stairs leading to the top, where you will be able to claim your collectible gift in Hogwarts Legacy.
Hogwarts Legacy Puzzle Room 2
When it comes to Depulso puzzles, the second group of chambers may be found in close proximity to ancient Egyptian hieroglyphs in Hogwarts Legacy.
Location
As seen from the courtyard of the Transfiguration To enter the History of Magic classroom, which is located at the end of the hallway, Floo Flame, you must first enter through the doors that are located to the northwest in Hogwarts Legacy.
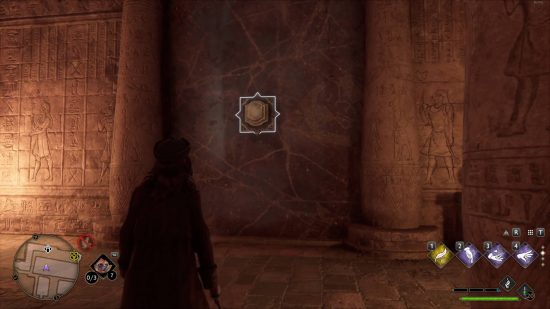
Alohomora is the key that will unlock the locked door on level 1. After that, there is a button that has to be pressed that is located at the end of the storage area that is next to the Sphinx and has Egyptian pillars.
To enter this new series of riddles, you will need to push it in Hogwarts Legacy.
Hogwarts Legacy: The block that is going to be pushed with Depulso to the corner is the one that substitutes the T in the second puzzle room. Depulso puzzles are located in this room in Hogwarts Legacy.
Chest #1
Using Accio, you should utilize the ledge to jump down to the left side of the room and then pull the enormous T from the rear of the room to the front of the room in Hogwarts Legacy.
In order to move the solitary block that is located behind you to the rear of the room, cast Accio around it. Take a leap of faith across the gap to your right and proceed to circle the platform.
For the purpose of bringing the two blocks located on the far right side of the room closer to the center, use Accio.
Hogwarts Legacy: Completing the stairs leading to the first puzzle chest is required for the Depulso puzzles.
Cast Accio to move the two blocks to the rear of the room, and then move to the right side of the two blocks to cast Depulso on the single block to move it to the corner of the room.
Perform one more casting of Depulso on the two blocks, and then join these three blocks into the shape of an L in Hogwarts Legacy.
Applying Accio will cause it to move closer to the center of the room while maintaining its proximity to the left wall. To obtain the first chest, you will need to climb this building.
Hogwarts Legacy: Constructing a peculiar form in the corner of the problem using some of the pieces of the puzzle is an example of a depulso puzzle.
First puzzle
Prior to the alteration of the entire space, a doorway leading to the beginning of the room will materialize behind you.
Cast Accio on the T-block construction while you are standing on top of the ledge. This will cause it to move to the right from where you are now standing.
Look to the right after you have jumped down. Accio should be cast on the block that is on the ground in order to send it to the opposite side of the room.
After that, Accio should be cast on the floating block that is above it in order to have it hug the wall to its right. Finally, Accio should be used to send the block to the opposite side of the room.
For the purpose of combining the three blocks into a reverse L shape, you must first leap across the gap to the middle and then go around to cast Depulso on the two blocks that are now on the ground.
Through the use of depulso puzzles, this staircase is created by joining the strange form with the T shape. After jumping over a gap, the next step is to climb up the block to the right. This is the beginning of the challenge.
Accio should be used to grab the two blocks from the first problem that are located on the wall opposite you. After that, you should cast Accio once more to move them to the wall behind you.
In order to unite the stack of three blocks, cast Depulso to send the two blocks together. Cast Accio to move your newly constructed five-block construction towards the rear wall, hugging the wall in front of you, and then cast Accio once again to bring it towards you.
You should direct your focus to the building that is in the shape of a T and cast Accio on the left side of it to send it flying to the wall on the other side. In order to incorporate the T-shape into your five-block layout, you will need to cast Accio one more time.
Make your way through the middle of the block construction in order to locate a spot where you may start climbing. For the following problem, you will need to go through the doors in Hogwarts Legacy.
Hogwarts Legacy: A witch is shown leaping across blocks in order to reach the second chest in the Depulso puzzles.
Chest #2
From the beginning of the room, cast Depulso on the column of two blocks (it is actually three blocks, but one of them is underneath the floor) to send it to the pillar in front of you.
Next, use Accio to move the large block to the right towards you, and then use Accio to send the column of three blocks to the wall on the other side of the room.
Please return the other block that you moved to its original location using Depulso.
Accio should be cast on the row of four blocks to get it to the wall behind you, and then it should be cast once more to get it stuck on the block that is sticking out. To gain access to the second chest, you will need to climb on top of it and behind it in order to cast Depulso.
Hogwarts Legacy: One of the answers to the third puzzle is found in the Depulso puzzles.
Chest #3
The problem should be reset, and then the column of two should be pushed towards the pillar such that all three blocks are visible.
Accio should be cast on the cluster that is located on the far right side of the chamber in order to transport them to the other side of the chasm.
After that, Accio should be thrown on the cluster that is located on the far north wall. In order to move the column of three around the rear right corner of the room, you should cast a sequence of Accios and Depulsos on it.
Utilize the Accio spell to seize the cluster on the left side of the column and secure it against it.
Next, move the row of four blocks to the left side of the room, and then move it to the wall on the left side of the rear wall.
Last but not least, use the Accio spell to combine the blocks on the back right with those on the back left, and then use the same spell to construct the staircase leading to the last chest.
A legacy of Hogwarts Creating a passageway leading to the exit of the chamber in the second room of problem 2 is the objective of the Depulso problem.
Second Puzzle
A leap down and a turn to the left should be taken from the beginning of the chamber. After casting Accio once again to move the blocks to the right, you should next use Depulso to send them back to the wall.
Accio should be used to drag the blocks that are located at the rear towards you. To transport the blocks to the other pillar that is close to you, you must first turn to the right, climb the blocks, and then use Accio on the blocks that are close to the pillar on the right.
The two blocks to the left should be cast with Depulso so that they collide with the pillar located in the rear left corner of the room.
After that, cast Accio so that the column of blocks is thrown to the right side of the room. Applying Depulso to those identical blocks will cause them to move to the corner of the room.
When you cast Accio on the block of three, it will send them to your left. Jump to the surrounding blocks that you moved previously in order to cast it.
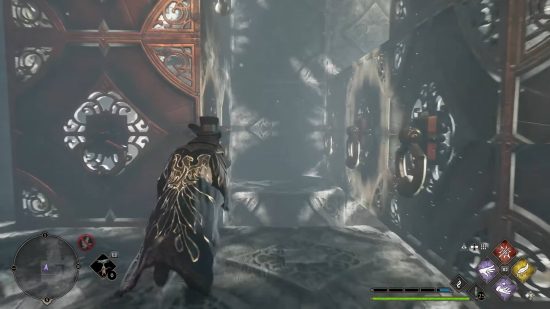
Hogwarts Legacy: In the second installment of the Depulso puzzles series, a wizard is shown traversing a makeshift bridge constructed out of blocks.
Depulso should be cast on the freshly created block in order to move it to the left. In order to confront the group of four blocks, you should leap from the structure.
You should cast Depulso to throw them on the wall behind them, and then you should cast Depulso once more to connect with the next blocks.
Now that we are getting near the end of the game, all that is left to do is cast Accio in order to push the entire building closer to the pillar.
It is possible to climb up it in order to reach a chest, then descend down, and then rise up again in order to carry it to the right in order to position it for the escape. In order to send the entire bridge to the rear wall, you must first climb the freshly built structure that resembles a bridge.
Then, cast Depulso on any block that is linked to it. At this point, you should be able to clamber up and make your escape with another collection as your compensation.
With that, you should have been able to complete all of the puzzle rooms in the Hogwarts Legacy Depulso experience.
Any further Depulso buttons that you discover on campus will take you to additional wealth, but there will be no more brainteasers.
Stay tuned for more gaming updates about Hogwarts Legacy, Pokemon and many more!