Accept the quest “One More Night in Amdapor” from E-Sumi-Yan in Old Gridania to open The Lost City of Amdapor (Hard) (X:6.1, Y:10.7)
But you need to finish a few other quests first before E-Sumi-Yan will let you do that.
Below, we’ll explain the exact steps:
Unlocking Instructions
- Complete the “The Ultimate Weapon” Main Scenario Quest (MSQ) from Raubahn in Northern Thanalan (X:15.0, Y:16.0)
- E-Sumi-Yan in Old Gridania will give you the quest “One Night in Amdapor” (X:6.1, Y:10.7)
- Complete the “Heavensward (Quest)” MSQ from the Guidance Node in Azys Lla (X:16.0, Y:22.0)
- E-Sumi-Yan in Old Gridania will give you the quest “One More Night in Amdapor” (X:6.1, Y:10.7)
- Raya-O-Senna can be found in the South Shroud (X:18.7, Y:27.0)
- Talk to Alphene in South Shroud (X:14.2, Y:30.6)
Detailed Unlocking Guide
To start The Lost City of Amdapor Questline, you have to finish the Main Scenario Quest (MSQ) “The Ultimate Weapon” from Raubahn in Northern Thanalan (X:15.0, Y:16.0).
This quest is part of the Main Scenario Questline for patch 2.0 of Final Fantasy XIV: A Realm Reborn.
Before you can start unlocking “The Ultimate Weapon,” you need to finish every MSQ that leads up to it.
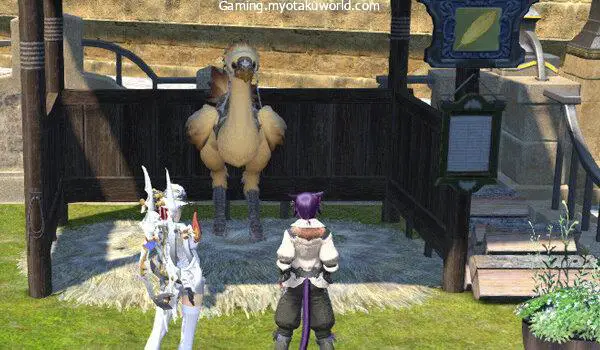
Once you finish “The Ultimate Weapon,” talk to the Conjurers Guild guild master E-Sumi-Yan in Old Gridania (X:61, Y:10.7) and accept the quest “One Night in Amdapor” to begin The Lost City of Amdapor Questline.
As with every hard version of a dungeon or trial in the game, you have to unlock and complete the normal version first.
When you’re done talking to E-Sumi-Yan, go into The Lost City of Amdapor and clean it up.
To enter the normal version of the dungeon, you need at least a level 50 Disciple of War or Magic job and an average item level of 55.
After you clear the dungeon, the Amdapor dungeon story won’t continue until you finish the MSQ “Heavensward” from the Guidance Node in Azys Lla (X:16.0, Y:22.0).
This quest is part of the Main Scenario Quest line for patch 3.0 of Final Fantasy XIV: Heavens ward, so you need to finish all of the MSQs leading up to “Heavens ward” before you can do this one.
This could take a while because you’ll need to finish a lot of MSQ patches (from 2.0 to 3.0).
Once that’s done (or if you’ve already gotten this far in the game), go back to E-Sumi-Yan and accept the quest “One More Night in Amdapor” to continue the story and start unlocking the hard version.
E-Sumi-Yan will tell you that the elementals who were controlling the darkness in the lost city have left for unknown reasons.
The guild master will send you to Camp Tranquil to talk to the Elder Seedseer’s younger sister about a plan of action.
Talk to Raya-O-Senna in the South Shroud (X:18.7, Y:27.0).
She will tell you about another power that may have been sleeping in the city.
Even though you worked hard to get rid of the darkness in the heart of the lost city, this force that had been sleeping has woken up and scared the elementals.
While the conjurers try to get the elementals to come back, talk to Alphene in the South Shroud (X:14.2, Y:30.6) and go back into the lost city to find out what’s going on.
The Lost City of Amdapor (Hard) will be unlocked after you talk to Alphene.
To go into the hard version of the dungeon, you’ll need at least a level 60 Disciple of War or Magic job and an average item level of 180.
Since this was added in Patch 3.2, a long time ago, it’s very easy to go through the dungeon alone with a level 90 or higher character.
But if you come across this dungeon in a duty roulette, you’ll have to do it together.
Quick Boss Strategy Guide

So you can clear the dungeon quickly and easily, here is a quick list of each boss and what they give you:
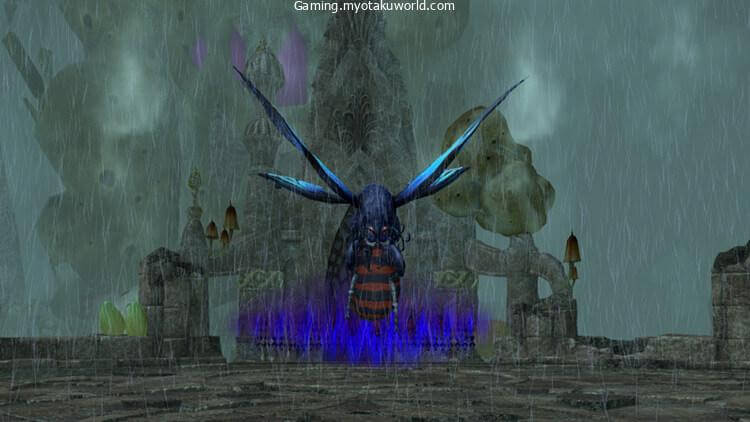
Boss #1: Achamoth
Mechanics:
Proboscis: The boss’s normal attack that isn’t shown ahead of time can cleave.
Tanks must face the boss away from the rest of the group.
Psycho Squama: The boss will aim a large frontal cone AoE at a random player.
If a player gets hit, they will be confused and can’t move for 4 seconds.
When you are close to the boss, it is easier to avoid this AoE.
Neuro Squama is a room-wide AoE attack that makes copies of players that can’t move after the cast.
The clones will cast “Enthrallment,” which is a weaker version of “Psycho Squama” and makes anyone who gets hit less safe.
Make sure you’re facing away from the boss when you cast “Enthrallment” so that the area-of-effect spell can reach the edges of the arena.
It can be hard to deal with “Psycho Squama” and “Enthrallment” area-of-effects that overlap, so watch where you are looking.
Toxic Orbs: A toxic orb will stick to a player at random.
This orb will make you less vulnerable and drop a poisonous puddle when you touch it.
Get the orb close to the edge of the arena so your group has room to move.
Boss #2: Winged Lion
Mechanics:
This boss will put elemental energies (Aero and Stone) in circular wall markers all over the arena.
To get rid of these markers, players should walk over them.
These energies will explode if they are left alone for too long.
Scratch: The boss’s normal attack that can’t be seen coming can cleave.
Tanks must face the boss away from the rest of the group.
Ancient Aero is an AoE attack that affects the whole room and traps air elemental orbs in circular walls.
Pop these markers to keep the party from getting too hurt.
Ancient Stone is an AoE attack that affects the whole room and traps earth elemental orbs in circular walls.
Pop these markers to keep the party from getting too hurt.
Ancient Holy: The boss will fly up and cast “Ancient Holy,” leaving in its place an “Arcane Sphere” mob.
Kill the Arcane Sphere to lessen the damage done by “Ancient Holy.”
Ancient Libra: An AoE attack that affects everyone in the room and lowers their wind or earth resistance.
Each player’s debuff will be different, so keep an eye on your debuffs as you pop the elemental energies.
Amdapori Gargoyle: During “Ancient Holy,” two gargoyles will appear after the second time it is cast.
Tanks should take care of these gargoyles while the rest of the group focuses on the “Arcane Sphere.”
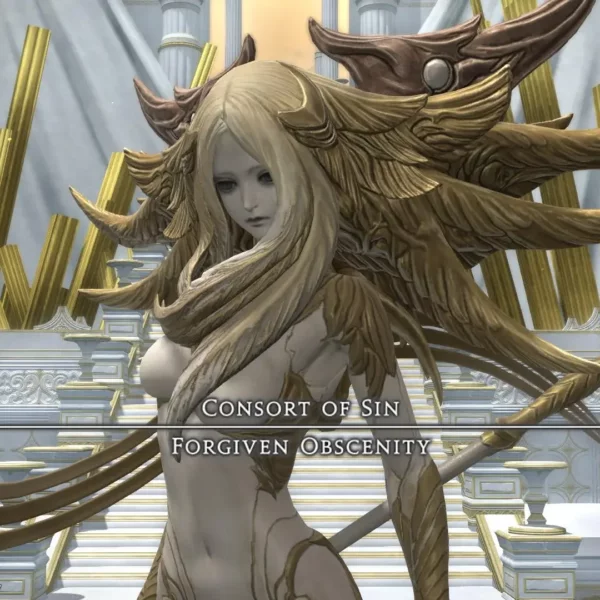
Boss #3: Kuribu
Mechanics:
The boss will start the fight with a buff called “Seed of Life”.
This buff shows how many lives she has left over.
Before the fight is over, you have to kill the boss three times.
Keep in mind that the rules from the previous phases will still apply to the ones that follow.
First Life
- Glory: A cone-shaped area of effect that should be turned away from the group.
- Regenerate: The boss will call up a big bubble that will slowly heal her.
- Get the boss away from the bubble that heals.
- Use your tank’s skills to interrupt the cast.
- Cure III is a healing spell that restores 10% of the boss’s HP.
- Cure IV is a healing spell that can restore up to 15% of the boss’s HP, depending on how low the boss’s HP is.
Second Life
One stack of her “Seed of Life” buff will change into a “Vulnerability Down” buff, which will make her less likely to take damage.
She will also get a buff called “Reverse,” which changes how some spells work.
- Regen (Reversed): A dark area of effect on the ground that hurts anyone who stands in it.
- Cure III (Reversed): A triangle will be drawn above the heads of two players, and a large red ring will be drawn around them.
- Players who are being watched should move away from the rest of the group and take damage.
- Cure IV (Reversed): An area of effect marker based on proximity.
- Move away from the marker to lessen the damage that will be done.
Third Life
For the cost of her “Seed of Life” buff, Kuribu will now get another stack of “Vulnerability Down”.
She will also be able to switch between her normal stance and her backward stance.
Remember how the mechanics worked in the previous phases, and always check to see if she has the “Reverse” buff or not.
This will help you deal with the mechanics that are coming up.
- Decoy: The boss will send out a “High Putto” that will stick to the boss or the players, depending on what the boss is doing at the time.
- Kill “High Putto” as soon as possible, no matter what.
- When “High Putto” is used with “Decoy” and “Normal Stance,” the boss will always be healed.
- Decoy + Reversed Stance: A random player will be tied down and get a DoT.
Extra Treasure Coffers
Aside from the rewards from the bosses, there are four treasure chests hidden around the dungeon that you can open to get more gear:
- (X:12.6, Y:10.3)
- (X:11.1, Y:11.8)
- (X:10.5, Y:11.6)
- (X:12.2, Y:9.4)