Pharos Sirius is unlocked through the quest “Things Are Getting Sirius” from Trachraet in Limsa Lominsa Upper Decks, you will gain access to the difficult dungeon Pharos Sirius (X:12.7, Y:12.8).
This quest will appear after reaching level 50 and completing the Main Scenario Quest ‘The Ultimate Weapon’.
However, before Trachraet will offer you the mission, you must accomplish a few prerequisite quests.
Let’s have a look at the entire chain of missions:
Unlocking Instructions
- Complete the “The Ultimate Weapon” Main Scenario Quest (MSQ) from Raubahn in Northern Thanalan (X:15.0, Y:16.0)
- Diamanda in Western La Noscea will give you the “Sirius Business” quest (X:26.5, Y:26.7)
- Diamanda in Western La Noscea will send you on a quest called “Why So Sirius” (X:26.5, Y:26.7)
- Complete the “Heavensward” MSQ from the Guidance Node in Azys Lla (X:16.0, Y:22.0)
- Trachraet in Limsa Lominsa Upper Decks will give you the quest “Things Are Getting Sirius” (X:12.7, Y:12.8)
- Western La Noscea has a place called the Storm Flyer (X:16.1, Y:30.3)
Detailed Unlocking Guide
Complete the Main Scenario Quest (MSQ) “The Ultimate Weapon” from Raubahn in Northern Thanalan to start this whole process (X:15.0, Y:16.0).
This quest is part of the Main Scenario Questline for Patch 2.0 of Final Fantasy XIV: A Realm Reborn. Before you can start unlocking the dungeon, you need to finish every MSQ leading up to “The Ultimate Weapon.”
After you finish the MSQ, go to Diamanda in western La Noscea (X:26.5, Y:26.7) to start the Pharos Sirius Questline.
You have to finish the normal version of the dungeon before you can unlock the hard version.
Take the “Sirius Business” quest from Diamanda and go to Pharos Sirius’s normal mode.
To get in, you need to be a Disciple of War of Magic at level 50 and have an average item level of 48.
Once you’ve finished the quest and cleared Pharos Sirius, go back to Diamanda and take the “Why So, Sirius?” quest to finish the story of the normal mode of the dungeon.
To move on with the Pharos Sirius Questline, you need to finish the MSQ “Heavensward” from the Guidance Node in Azys Lla (X:16.0, Y:22.0).
This quest is part of the Main Scenario Questline for patch 3.0 of Final Fantasy XIV: Heavensward, so you need to finish every MSQ before “Heavensward.”
Depending on how many MSQ patches (from 2.0 to 3.0) you may need to do, this could take a while.
After you finish the “Heavensward” quest, go to Limsa Lominsa Upper Decks (X:12.7, Y:12.8) and talk to Trachraet about the “Things Are Getting Sirius” quest.
Trachaet will tell you about the attack by kobolds that made the blacksmiths who were fixing up Pharos Sirius run away. Trachaet will tell you to go to Western La Noscea to find out more about how to fix the situation and save the lighthouse.
Talk to the Storm Flyer in Western La Noscea (X:16.1, Y:30.3). He will tell you that one of the smiths said that the kobolds want to blow up the lighthouse.
After Maelstrom Command figures out what’s going on, you’ll be asked to go back into Pharos Sirius and drive the kobolds out.
After you talk to the Storm Flyer about this, Pharos Sirius (Hard) will become available.
To get into the dungeon, you need to be a Disciple of War or Magic at least level 60 and have an average item level of 170.
Since this dungeon came out in patch 3.1, a long time ago, it’s very easy to go in alone with a level 90+ character if you’re not in sync. But if you run into this dungeon in a duty roulette, you’ll have to do it together with other players.
Boss Strategy Guide
So you can get through the dungeon quickly, here is a list of each boss and what they give you:
Boss #1: Ghrah Luminary
Mechanics:
On the outside edges of the arena, you will see birds and spiders. Keep track of where these creatures are during the fight. This will help you deal with how the fight works.
- Vorpal Blade: The boss’s normal attack, which isn’t shown ahead of time, can cleave. Tanks must face the boss away from the rest of the group.
- With the Luminous Lancet, AoEs in a circle target three players. You can easily avoid these AoEs, so try to stay away from them as much as possible.
- Orbs will appear and stick to players. After a while, the orbs will give birth to “corruption” mobs based on who they were tied to.
- Corruption (Humanoid): Mobs that appear when the “Prey” timer runs out and the orb is still attached to a player. This mob can use an AoE frontal cone and also increase the boss’s damage. Always tie your orbs to a bird or a spider to avoid this happening.
- Corruption (Bird): This monster appears when the “Prey” timer runs out and the orb is tied to a bird. When this mob dies, it will drop a poisonous AoE puddle. Get rid of these birds near the edge of the arena.
- Corruption (Spider): This monster appears when the “Prey” timer runs out and the orb is tied to a spider. This mob can use AoE attacks from close range.
Boss #2: 8th Order Patriarch Be Gu
Mechanics:
- Strip Mine: A nearby area-of-effect marker Move away from the marker to lessen the damage that will be done.
- Aether Valves + Corrupted Gel: There will be broken valves and “corrupted gel” mobs all over the arena. To stop the flow of aether, the gel mobs should be killed over the broken valves. If you leave these mobs alone for too long, they will also explode and damage the whole room. As soon as possible, kill the “corrupted gels” on top of the broken valve.
- Alchemy Engine + 8th Order Furnaceman: Two pairs of Alchemy Engines and 8th Order Furnacemen will appear. During this time, any player who attacks the boss will be stunned for two seconds and then hit by “Loose Screw.” Furnacemen will also sometimes drop AoEs in random places around the arena.
- To deal with this machine, you need to first kill the engines and then the furnacemen. Don’t hit the boss until the furnacemen have been taken out.
- Loose Screw: During the “8th Order Furnacemen + Alchemy Engine” phase, players who attack the boss will be charged. To avoid doing extra damage, don’t hit the boss while the mobs are still up.
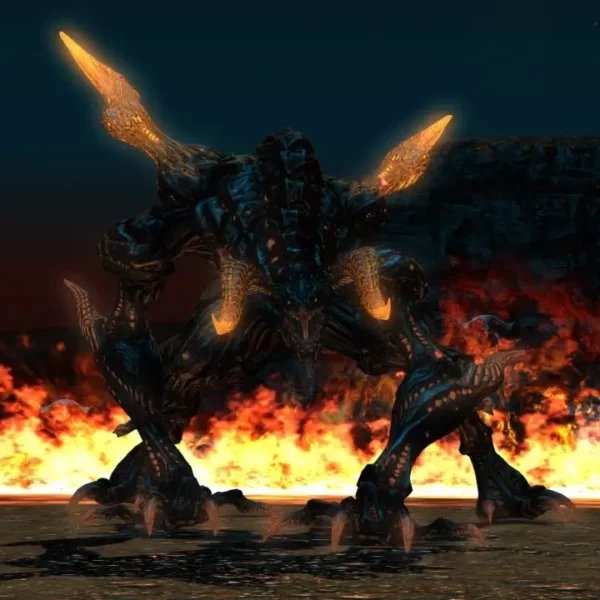
Boss #3: Progenitrix and Progenitor
Mechanics:
There will be two parts to this fight: the Progenitor phase and the Progenitor phase.
Phase 1: Progenitrix
- Scalding The boss’s normal attack, which you can’t see coming, can cleave. Tanks must face the boss away from the rest of the group.
- Bombshell Drop: The arena will be filled with one “grey bomb” and two “lava bombs.” The “Grey Bomb” will keep getting bigger until it finally goes off. Kill the “Grey Bomb” first, then the “Lava Bombs.”
- Sap: Large circle AoE attack. This attack is easy to avoid because it takes a long time to cast.
- Big Burst: When the boss’s health drops to 1%, it will use a very powerful attack that affects the whole room. This mechanism also lets you know that the second phase has begun. Try to lessen the damage and get better.
Phase 2: Progenitor
After “Big Burst” is used by Progenitrix, three “Grey Bombs” and three “Lava Bombs” will appear. Use these bombs in the same way that you use “Bombshell Drop.” After the bombs are killed, a Progenitor will appear.
- Blue Flame: During this phase, the boss will sometimes damage the whole room with an AoE spell. This attack will also give you a fire-resistance-lowering debuff that builds up over time. Try to lessen the damage and get better. If the fight goes on for too long, this attack will become deadly.
- Big Burst + Grey Bomb and Remedy Bomb: The boss will start its own bomb phase by using “Big Burst.” This time, the “Grey Bombs” will be joined by the “Remedy Bombs” in blue. If the “Remedy Bombs” get too close to the “Grey Bombs,” they will explode and probably kill the party.
- You can push “remedy bombs” away from “grey bombs” with an attack, so make sure to move any that are getting close. Kill the “grey bombs” first, just like in the Progenitrix Phase.
Extra Treasure Coffers
Aside from the rewards from the bosses, there are four treasure chests hidden around the dungeon that you can open to get more gear:
- (X:11.3, Y:10.0)
- (X:10.9, Y:10.5)
- (X:10.7, Y:9.7)
- (X:8.8, Y:9.6)