To unlock Brayflox’s Longstop (Hard), you must first be level 50 in either a Disciple of War or a Disciple of Magic job.
Then, talk to Bloezoeng in Mor Dhona (X:22.0, Y:8.7) and take the “Curds and Slay” quest.
Before Brayflox’s Longstop (Hard) can be unlocked, you need to do a few quests first, including the final Main Scenario Quest (MSQ) of patch 2.0: A Realm Reborn.
Unlocking Instructions
- Complete the “The Things We Do for Cheese” Main Scenario Quest (MSQ) from Wheiskaet in Eastern La Noscea (X:32.6, Y:30.5)
- Complete the “The Ultimate Weapon” MSQ from Raubahn in Northern Thanalan (X:15.0, Y:16.0)
- Bloezoeng in Mor Dhona will give you the “Curds and Slay” quest (X:22.0, Y:8.7)
- In Eastern La Noscea, you’ll see Wheiskaet again (X:32.6, Y:30.5)
- Talk to Brayflox Alltalks in Eastern La Noscea outside of her Longstop (X:14.8, Y:24.5)
Detailed Unlocking Guide
You would be helping Brayflox with her humble home for the second time in Brayflox’s Longstop (Hard), so you’ll need to finish the normal version of Brayflox’s Longstop first.
You can do this by finishing the Main Scenario Quest (MSQ) “The Things We Do for Cheese” from Wheiskaet in Eastern La Noscea (X:32.6, Y:30.5).
In Brayflox’s Longstop, you have to kill the dragon Aiatar who is trying to take over.
Next, you must finish “The Ultimate Weapon” MSQ from Raubahn in Northern Thanalan (X:15.0, Y:16.0).
This is the last quest in the Main Scenario Questline for patch 2.0 of Final Fantasy XIV: A Realm Reborn.
Before you can move on, you must have completed all of the MSQs that led up to “The Ultimate Weapon.”
After you finish “The Ultimate Weapon,” you’ll be able to do quests for expert-level dungeons in the ARR expansion.
One of these quests will unlock Brayflox’s Longstop (Hard).
Bloezoeng in Mor Dhona will give you the “Curds and Slay” quest if you go to the Seventh Heaven Bar in Revenant’s Toll (X:22.0, Y:8.7).
The chef will be happy to see you because he has been looking for you on behalf of a coworker.
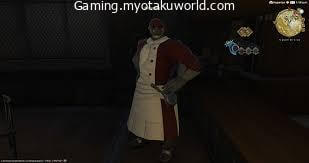
Drystweitz, a member of the Culinarian’s Guild and the owner of the bar “The Flying Shark” in Costa del Sol, has been looking for adventurers to help his friend Wheiskaet.
Talk to Wheiskaet again in Eastern La Noscea.
Go to Costa del Sol (X:32.6, Y:30.5)
Wheiskaet will tell you that Brayflox is once again in danger.
He can’t leave his job as a guard in Costa del Sol, where he used to be a captain.
So instead, he wants you to help the goblin who is in trouble.
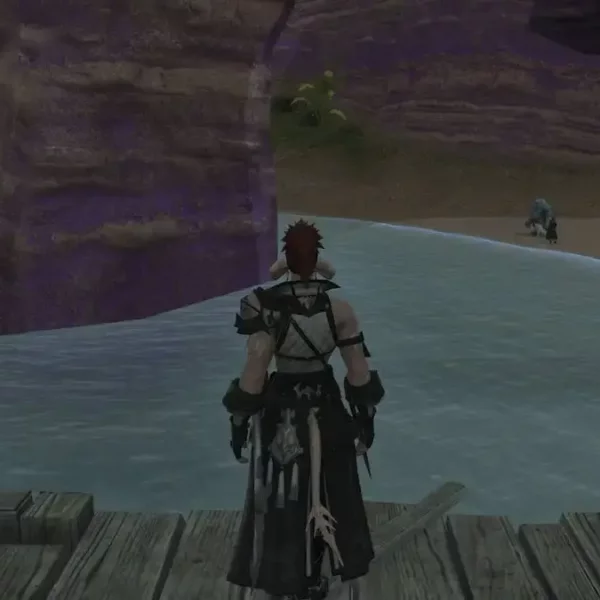
Brayflox Alltalks can be found outside her Longstop in Eastern La Noscea (X:14.8, Y:24.5).
The Illuminati, a group of bad goblins, seems to have heard about how well-known Brayflox is for making cheese.
These goblins have taken over Brayflox’s Longstop and will do anything to get her secret cheese recipe.
Since she had to leave her home again, Brayflox will ask for your help to get the people who want to rule the cheese out of her Longstop.
Talking to Brayflox will unlock the dungeon Brayflox’s Longstop (Hard).
You need at least a level 50 Disciple of War or Magic job and an average item level of 55 to get into the dungeon.
Since this dungeon was added in patch 3.2, a long time ago, it’s easy to go through it alone with a level 90 or higher character who isn’t in sync.
But if you come across this dungeon in a duty roulette, you’ll have to do it together with other players.
Here is a list of each boss and what they give you to help you get through the dungeon.
Boss #1: Illuminati Commander
Mechanics
This boss is pretty easy.
All you have to do is avoid his AoE attacks and kill any “Illuminati Sniper” mobs that lock onto players.
Tank the boss to the north so the rest of the group has more room to move out of the way of the fast column AoEs.
- Goblin Rush: A tank-busting attack that hits the main target three times.
- Use skills that lessen damage and heal as you take it.
- Bomb Toss: The boss will pick a player and throw a bomb in their direction, creating an area of effect (AoE) in the shape of a large circle under them.
- Leave the area of effect.
- Illuminati Sniper: Goblin snipers will spawn and randomly attach themselves to a player.
- These snipers will keep firing “Sniper Shot” at the players who are tied down until they die.
- The tank should pick up these monsters while everyone else kills them as quickly as they can.
- Bombs on the ground: Randomly, more bombs will appear around the arena and drop column AoEs in the four cardinal directions.
- These Areas of Effect go off quickly, so move away from the bombs before they go off.
Rewards
- 7 Allagan Tomestone of Poetics
| Name | Type | Rarity |
|---|---|---|
| Darklight Bracelet of Aiming | Bracelets | Tomestone (Blue) |
| Darklight Bracelet of Casting | Bracelets | Tomestone (Blue) |
| Darklight Bracelet of Fending | Bracelets | Tomestone (Blue) |
| Darklight Bracelet of Healing | Bracelets | Tomestone (Blue) |
| Darklight Bracelet of Maiming | Bracelets | Tomestone (Blue) |
| Darklight Bracelet of Striking | Bracelets | Tomestone (Blue) |
| Darklight Boots of Casting | Feet | Tomestone (Blue) |
| Darklight Boots of Healing | Feet | Tomestone (Blue) |
| Darklight Caligae of Aiming | Feet | Tomestone (Blue) |
| Darklight Caligae of Striking | Feet | Tomestone (Blue) |
| Darklight Sollerets | Feet | Dungeon (Green) |
| Fistfighter’s Jackboots | Feet | Dungeon (Green) |
| Hussar’s Jackboots | Feet | Dungeon (Green) |
| Magician’s Shoes | Feet | Dungeon (Green) |
| Pilgrim’s Shoes | Feet | Dungeon (Green) |
| Protector’s Sollerets | Feet | Dungeon (Green) |
| Shikaree’s Boots | Feet | Dungeon (Green) |
| Darklight Band of Aiming | Ring | Tomestone (Blue) |
| Darklight Band of Casting | Ring | Tomestone (Blue) |
| Darklight Band of Fending | Ring | Tomestone (Blue) |
| Darklight Band of Healing | Ring | Tomestone (Blue) |
| Darklight Band of Maiming | Ring | Tomestone (Blue) |
| Darklight Band of Striking | Ring | Tomestone (Blue) |
Boss #2: Magitek Vangob G-III

Mechanics
Goblins outside the arena will keep throwing ceruleum barrels, which will make puddles of blue ceruleum all over the room that can’t be hit.
These AoEs won’t deal damage if you stand on them, but they will explode after a while, so try to stay away from them.
- Cermet Drill: A tankbuster attack on the main target.
- Use skills that lessen damage and heal as you take it.
- Drill Cannons have an area of effect on a random player that is wide and long.
- When the room is full of blue ceruleum AoEs, it can be hard to avoid these, but you should always try to avoid these first.
- Needle Burst is a room-wide AoE attack. Try to lessen the damage and get better.
- Illuminati Glider: At any time, up to two “Illuminati Glider” mobs can appear and attack random players.
- To cut down on damage, the tank should pick them up while the others attack them.
- Bomb Toss (Illuminati Glider): Occasionally, gliders will throw bombs at random players. Move quickly toward the safe zones and stay away from the ceruleum puddles.
- Glider Ram (Illuminati Glider): Illuminati Gliders will rush at a player, doing moderate damage. You can’t avoid this attack.
- Oversurge is a direct AoE that hits the boss.
- Tanks and people who use melee attacks should move away from the boss before the spell is cast.
- Career: A mark will show up on a player chosen at random.
- A few seconds later, the boss will run toward them.
- Healers should heal the player who is about to be hit before they are hit.
Rewards
- 13 Allagan Tomestone of Poetics
| Name | Type | Rarity |
|---|---|---|
| Darklight Earrings of Aiming | Earrings | Tomestone (Blue) |
| Darklight Earrings of Casting | Earrings | Tomestone (Blue) |
| Darklight Earrings of Fending | Earrings | Tomestone (Blue) |
| Darklight Earrings of Healing | Earrings | Tomestone (Blue) |
| Darklight Earrings of Maiming | Earrings | Tomestone (Blue) |
| Darklight Earrings of Striking | Earrings | Tomestone (Blue) |
| Darklight Bracers of Aiming | Hands | Tomestone (Blue) |
| Darklight Bracers of Striking | Hands | Tomestone (Blue) |
| Darklight Gauntlets | Hands | Tomestone (Blue) |
| Darklight Gloves of Casting | Hands | Tomestone (Blue) |
| Darklight Gloves of Healing | Hands | Tomestone (Blue) |
| Fistfighter’s Gloves | Hands | Dungeon (Green) |
| Heavy Darklight Gauntlets | Hands | Tomestone (Blue) |
| Hussar’s Gloves | Hands | Dungeon (Green) |
| Magician’s Gloves | Hands | Dungeon (Green) |
| Pilgrim’s Gloves | Hands | Dungeon (Green) |
| Protector’s Gauntlets | Hands | Dungeon (Green) |
| Shikaree’s Gloves | Hands | Dungeon (Green) |
| Darklight Eyepatch of Aiming | Head | Tomestone (Blue) |
| Darklight Eyepatch of Striking | Head | Tomestone (Blue) |
| Darklight Helm | Head | Tomestone (Blue) |
| Fistfighter’s Goggles | Head | Dungeon (Green) |
| Hussar’s Goggles | Head | Dungeon (Green) |
| Magician’s Hat | Head | Dungeon (Green) |
| Pilgrim’s Eyepatch | Head | Dungeon (Green) |
| Protector’s Barbut | Head | Dungeon (Green) |
| Shikaree’s Mask | Head | Dungeon (Green) |
| Darklight Choker of Aiming | Necklace | Tomestone (Blue) |
| Darklight Choker of Casting | Necklace | Tomestone (Blue) |
| Darklight Choker of Fending | Necklace | Tomestone (Blue) |
| Darklight Choker of Healing | Necklace | Tomestone (Blue) |
| Darklight Choker of Maiming | Necklace | Tomestone (Blue) |
| Darklight Choker of Striking | Necklace | Tomestone (Blue) |
Boss #3: Gobmachine G-VI
Mechanics
During the fight, this boss will go around the room and hit anyone in their way when it can’t be targeted.
Focus on the bombs that will appear during the fight to keep your group from being wiped out.
- Flamethrower: A tankbuster attack that cuts through the main target.
- Face the boss away from the group, use skills that reduce damage, and heal as needed.
- Bombardment is an AoE attack that is aimed at a random player.
- Spread out to avoid getting hurt twice.
- Bombs: When your health is around 80%, bombs will start to appear around the arena.
- After a while, they will go off.
- If more than one bomb goes off, it’s likely that the party will be wiped out.
- Any attack that hits a bomb will make it move back.
- Use attacks with a wide area of effect (AoE) on the bombs to make a safe area in the middle of the arena.
- Scramble: The boss will stop being able to be shot at and will start running around the room.
- During this time, pay attention to the extra mobs and bombs.
- Illuminati Sniper and Illuminati Soldier: Like with the other bosses, more Illuminati mobs will spawn to do more damage to players.
- The tank should pick them up while the rest of the team focuses on killing them.
- Sniper Shot (Illuminati Sniper): With this attack, snipers will attach to a player and keep shooting them, just like the snipers on the first boss.
- Goblin Rush (Illuminati Soldier): Soldiers will use a weaker version of the boss’s three-hit “tankbuster” attack, which is used by the Illuminati Commander.
- Healers should watch out for players that the soldiers are going after.
- Hit and Run: The boss will turn and charge at a random player.
- Get out of its way to avoid more damage.
- Giant Bomb: When the boss has about 10% health left, a giant bomb will appear.
- This bomb can’t be moved, so if you don’t destroy it before it goes off, you’ll probably lose.
Rewards
- 20 Allagan Tomestone of Poetics
| Name | Type | Rarity |
|---|---|---|
| Darklight Corselet of Aiming | Body | Tomestone (Blue) |
| Darklight Corselet of Striking | Body | Tomestone (Blue) |
| Darklight Cowl of Casting | Body | Tomestone (Blue) |
| Darklight Cowl of Healing | Body | Tomestone (Blue) |
| Darklight Cuirass | Body | Tomestone (Blue) |
| Fistfighter’s Jackcoat | Body | Dungeon (Green) |
| Heavy Darklight Armor | Body | Tomestone (Blue) |
| Hussar’s Jackcoat | Body | Dungeon (Green) |
| Magician’s Robe | Body | Dungeon (Green) |
| Pilgrim’s Robe | Body | Dungeon (Green) |
| Protector’s Cuirass | Body | Dungeon (Green) |
| Shikaree’s Doublet | Body | Dungeon (Green) |
| Darklight Breeches of Casting | Legs | Tomestone (Blue) |
| Darklight Breeches of Healing | Legs | Tomestone (Blue) |
| Darklight Kecks | Legs | Tomestone (Blue) |
| Darklight Subligar | Legs | Tomestone (Blue) |
| Darklight Trousers | Legs | Tomestone (Blue) |
| Fistfighter’s Breeches | Legs | Dungeon (Green) |
| Heavy Darklight Flanchard | Legs | Tomestone (Blue) |
| Hussar’s Breeches | Legs | Dungeon (Green) |
| Magician’s Slops | Legs | Dungeon (Green) |
| Pilgrim’s Slops | Legs | Dungeon (Green) |
| Protector’s Trousers | Legs | Dungeon (Green) |
| Shikaree’s Gaskin | Legs | Dungeon (Green) |
| Baby Opo-opo | Minion | Basic |
| Fury Orchestrion Roll | Orchestrion Roll | Basic |
Extra Treasure Coffers
Aside from the rewards from the bosses, there are four treasure chests hidden around the dungeon that you can open to get more gear:
- (X: 12.5 Y: 11.0)
- (X: 12.5 Y: 10.1)
- (X: 12.5 Y: 9.5)
- (X: 10.3 Y: 8.8)